
Wooden clock kits provide all the necessary components and instructions to build a functioning clock from scratch. With various sizes and styles available, these kits are ideal for both beginner and experienced clockmakers, offering a rewarding and enjoyable diy project.
Whether you’re looking for a decorative piece or a functional timekeeping device, wooden clock kits offer a customizable and unique option to showcase your craftsmanship. From traditional designs to modern and intricate patterns, these kits allow you to create a personalized timepiece that reflects your style and creativity.
By assembling the components yourself, you not only gain the satisfaction of building something with your own hands, but also the opportunity to learn about the inner workings of a clock.

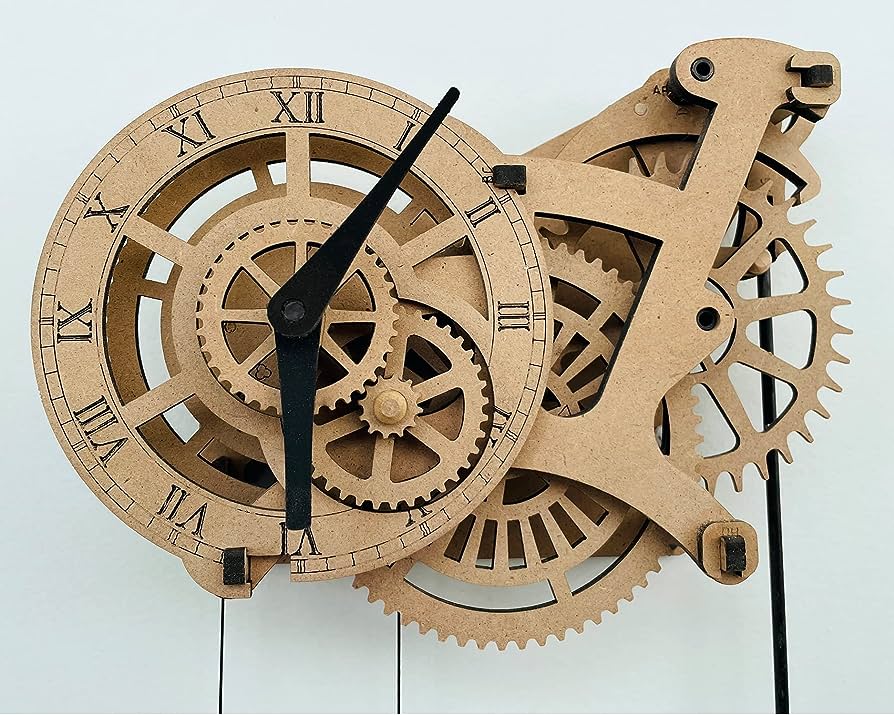
Wooden Clocks Kits
Credit: www.amazon.com
The Benefits Of Wooden Clock Kits
Why Diy Timekeeping Is Gaining Popularity
Wooden clock kits have become increasingly popular among diy enthusiasts and hobbyists who want to add a touch of uniqueness to their homes. Building a clock from scratch not only allows for personalization but also provides a sense of accomplishment and satisfaction.
Whether you are a beginner or an experienced diyer, there are several benefits to opting for wooden clock kits.
Advantages Of Choosing Wooden Clock Kits
- Customization: Wooden clock kits offer endless possibilities for customization. From choosing the type of wood and stain to selecting the clock face design, you have the freedom to create a clock that perfectly matches your home decor.
- Educational experience: Building a wooden clock from a kit allows individuals to develop their woodworking skills while learning about timekeeping mechanisms. It provides an excellent opportunity to understand the intricacies of clockwork and gain knowledge about how time is measured.
- Cost-effective: Investing in a wooden clock kit is often more affordable than purchasing a ready-made wooden clock. Kits typically come with all the necessary materials and instructions, eliminating the need for additional tools and supplies. This cost-effectiveness makes wooden clock kits an attractive option for budget-conscious individuals.
- Creative outlet: Constructing a wooden clock offers a creative outlet for those who enjoy working with their hands. The process of assembling the various components and watching the clock come to life brings a sense of satisfaction and pride. It allows individuals to express their artistic side while creating a functional piece.
- Therapeutic and relaxing: Engaging in a diy project like building a wooden clock can be therapeutic and relaxing. The focus required during the assembly process can help alleviate stress and promote mindfulness. It provides a break from digital distractions and allows individuals to immerse themselves in a hands-on activity.
- Unique and personalized: By building your own wooden clock, you can create a unique timepiece with sentimental value. Whether it’s a gift for a loved one or a striking centerpiece for your own home, a handmade clock holds more meaning than a mass-produced one. It becomes a reflection of your personal style and craftsmanship.
- Sense of achievement: Completing a wooden clock kit successfully brings a great sense of achievement. The process of overcoming challenges, following instructions, and seeing the clock’s mechanism work flawlessly is incredibly rewarding. It instills confidence in your abilities and encourages further exploration of diy projects.
Wooden clock kits offer numerous benefits beyond traditional timekeeping. They provide an opportunity for creativity, personalization, and skill development. By building your own clock, you can create a unique and functional piece that adds a touch of character to your living space while experiencing the satisfaction of a successful diy project.
Getting Started With Wooden Clock Kits
If you’re a fan of diy projects and are looking for a unique and functional item to create, wooden clock kits might be just what you need. Building your own wooden clock not only allows you to showcase your craftsmanship but also adds a personalized touch to your home or office decor.
Before diving into this exciting project, let’s explore the steps you need to take to get started with wooden clock kits.
Selecting The Right Wooden Clock Kit For Your Skill Level:
When it comes to choosing a wooden clock kit, it’s crucial to consider your skill level and experience in woodworking. Here are some key points to keep in mind:
- Beginner-friendly kits: If you’re new to woodworking or clock-making, opt for kits specifically designed for beginners. These kits typically feature simpler designs and detailed instructions, making it easier for you to follow along.
- Intermediate-level kits: If you have some experience with woodworking but are not yet an expert, intermediate-level clock kits can offer the right level of challenge. These kits may incorporate more intricate designs and require additional skills to assemble.
- Advanced kits: For seasoned woodworkers looking for a more challenging project, advanced clock kits are the way to go. These kits often feature complex mechanisms and require a higher level of precision and expertise.
Understanding The Components Included In A Wooden Clock Kit:
Before starting your wooden clock project, it’s essential to familiarize yourself with the components included in the kit. This will help you better understand the assembly process and ensure that you have all the necessary parts. Here are the common components you can expect to find:
- Wooden pieces: Clock kits typically include pre-cut wooden parts that form the structure and aesthetic of the clock. These pieces may range from the clock face and frame to gears and pendulums.
- Clock movement: The clock movement is the mechanism responsible for the clock’s timekeeping. It consists of the hands, gears, and motor that allow the clock to accurately tell time.
- Hardware: Clock kits often come with a variety of hardware, such as screws, washers, nuts, and other fastening components. These are essential for securely assembling the wooden pieces and attaching the clock movement.
- Instruction manual: Most wooden clock kits come with a detailed instruction manual that provides step-by-step guidance on assembling the clock. Make sure to read through the instructions thoroughly before starting.
Essential Tools And Materials Needed For Assembly:
To successfully assemble a wooden clock kit, you’ll need a few tools and materials at your disposal. Here’s what you should have on hand:
- Woodworking tools: Depending on the complexity of the clock kit, you may need a range of woodworking tools, including a saw, drill, chisels, sandpaper, and clamps. These tools will help you shape and refine the wooden pieces.
- Adhesives and finishes: Some clock kits may require the use of wood glue or other adhesives to ensure sturdy construction. Additionally, you may want to apply a finish, such as varnish or paint, to enhance the appearance of the clock.
- Basic hand tools: It’s always handy to have a set of basic hand tools, such as screwdrivers, pliers, and wrenches, for adjusting and tightening screws and hardware.
- Safety equipment: When working with power tools, it’s important to prioritize safety. Wear safety goggles, gloves, and a dust mask to protect yourself from potential hazards.
Now that you have a clear understanding of the key considerations when getting started with wooden clock kits, you’re ready to embark on this rewarding journey. Choose a kit that suits your skill level, familiarize yourself with the components, gather the necessary tools, and get ready to create a stunning wooden clock that you can proudly display.
Happy crafting!
Step-By-Step Guide To Assembling A Wooden Clock Kit
Are you ready to embark on a delightful journey of assembling your own wooden clock? With a wooden clock kit, you have the opportunity to bring out your inner craftsman and create a magnificent timepiece. In this step-by-step guide, we will walk you through the process of assembling a wooden clock kit, from preparing the wooden pieces to following the detailed instructions provided.
So, let’s get started!
Preparing The Wooden Pieces For Assembly:
To ensure the smooth assembly of your wooden clock, it’s crucial to properly prepare the wooden pieces. Here are a few important steps to follow:
- Inspect the wooden pieces for any defects or damage, such as cracks or splinters. Sand down any rough edges for a neat finish.
- Organize the pieces in a logical order according to the instructions provided. This will help you stay organized throughout the assembly process.
- Familiarize yourself with the different types of wooden pieces and their functions. This will make it easier to visualize the final product and understand how they fit together.
Following The Detailed Instructions Provided With The Kit:
Now that you have your wooden pieces ready, it’s time to dive into the instructions provided with the kit. Here’s how you can make the most of the instructions:
- Begin by carefully reading through the entire instruction manual before starting the assembly. This will give you an overview of the entire process and help you plan accordingly.
- Take it one step at a time. Follow each instruction closely and ensure that you understand it before moving on to the next step. Rushing through the process may result in errors or missing crucial details.
- Pay attention to the diagrams and illustrations provided. These visual aids can greatly enhance your understanding of the assembly process.
- If any part of the instructions seems unclear, don’t hesitate to reach out to the manufacturer or online communities for clarification. It’s better to seek guidance than risk making a mistake.
Tips And Tricks For Efficiently Building Your Wooden Clock:
Building a wooden clock can be a rewarding yet time-consuming task. To help you breeze through the assembly process, here are some tried and tested tips and tricks:
- Set up a dedicated workspace with ample lighting and enough room to spread out the wooden pieces and tools. A clutter-free area will make it easier to focus and reduce the chances of misplacing components.
- Keep your tools organized and within reach. Use small containers or magnetic strips to hold nails, screws, and other small parts. This will save you precious time rummaging through a pile of tools.
- Take breaks whenever needed. It’s essential to give yourself some time to rest and recharge. This will not only prevent burnout but also ensure that you maintain focus and attention to detail throughout the assembly process.
- Don’t be afraid to personalize your wooden clock. Add your own artistic touch by experimenting with different finishes or adding decorative elements. Let your creativity shine!
Remember, assembling a wooden clock kit requires patience, precision, and a willingness to learn. Embrace the journey and enjoy the process of bringing a beautiful timepiece to life. Happy crafting!
Personalizing Your Wooden Clock
Adding your own unique touch to the design:
- Engrave your initials or a special message on the clock face for a personal touch.
- Experiment with different types of wood stains or paints to create a unique color scheme.
- Customize the clock hands by painting them in a contrasting color or adding decorative patterns.
Choosing the right finish for your wooden clock:
- Consider using a clear varnish or lacquer to preserve the natural beauty of the wood.
- Apply a stain to enhance the grain pattern and add depth to the wood.
- Use a combination of finishes, such as stain and varnish, to achieve the desired look.
Incorporating additional features or decorations:
- Add decorative elements like metal accents, beads, or gemstones to make your wooden clock stand out.
- Install a chime mechanism to give your clock a classic touch.
- Consider adding a pendulum for a more traditional and elegant appearance.
Remember, personalizing your wooden clock allows you to create a unique piece that reflects your style and preferences. Let your creativity flow and enjoy the process of making your wooden clock truly one-of-a-kind.
Troubleshooting Common Issues With Wooden Clock Kits
Identifying And Fixing Assembly Errors:
- Incorrect alignment of clock hands: Ensure that the hour and minute hands are installed in the correct position, aligned with the corresponding numerical indicators on the clock face.
- Loose or wobbly clock mechanism: Check if the clock mechanism is securely attached to the clock case by tightening any screws or fasteners. This will help stabilize the movement of the clock hands.
- Uneven placement of clock numerals: Double-check the positioning of the numerals on the clock face to ensure they are evenly spaced and aligned. Adjust as needed to create a balanced appearance.
- Inaccurate timekeeping: If the clock is not keeping accurate time, check the hands to ensure they are not rubbing against each other or the clock face. Consider adjusting the position of the hands or replacing the clock movement if necessary.
Dealing With Broken Or Misaligned Components:
- Cracked or broken wooden parts: Evaluate the damaged component and determine if it can be repaired using wood glue or epoxy. If the damage is extensive, consider contacting the manufacturer for a replacement part.
- Misaligned gear teeth: If the clock is not functioning properly, inspect the gears for any misalignments or obstructions. Carefully adjust and realign the teeth of the gears to ensure smooth movement.
- Loose or damaged clock hands: If the clock hands are loose or bent, gently tighten or straighten them. If they cannot be fixed, consider replacing them with new hands.
Common Challenges And How To Overcome Them:
- Lack of proper instructions: Refer to the instruction manual or search for online resources that provide more detailed guidance on assembling the specific wooden clock kit you are working with.
- Difficulty in understanding assembly steps: Break down each step into smaller tasks and follow them sequentially. Refer to diagrams or video tutorials if available.
- Insufficient tools or parts: Ensure that you have all the necessary tools and parts before starting the assembly process. Contact the manufacturer or look for compatible alternatives if any required items are missing.
- Patience and persistence: Assembly can sometimes be time-consuming and intricate. Approach each step with patience, paying attention to detail, and seeking assistance or advice if needed.
Remember, troubleshooting issues with wooden clock kits requires careful observation and perseverance. By closely following the assembly instructions and applying the suggested solutions, you can overcome common challenges and achieve a beautifully functioning wooden clock.
Showcasing Your Diy Wooden Clock
Displaying Your Completed Wooden Clock With Pride:
- Once you have completed your diy wooden clock, it’s time to showcase your craftsmanship and enjoy the fruits of your labor. Here are a few ways to proudly display your wooden clock:
- Wall-mounted statement: Hang your wooden clock on a prominent wall in your home to make it a focal point of the room. Choose a spot where it can be easily seen and admired.
- Mantel centerpiece: If you have a fireplace or a mantel, place your wooden clock on it to add a touch of elegance and charm. It will not only enhance the visual appeal of your mantel but also serve as a functional timepiece.
- Shelf or side table accent: Place your wooden clock on a shelf or a side table to enhance the overall aesthetic of your living space. It will not only be a conversation starter but also an eye-catching accent piece.
- Office desk accessory: Bring a touch of nature to your workspace by placing your wooden clock on your office desk. Not only will it add a sophisticated touch, but it will also serve as a reminder of your diy achievement.
Creative Ways To Incorporate Your Wooden Clock Into Your Home Decor:
- Your wooden clock doesn’t have to be confined to a traditional clock placement. Here are a few creative ideas to incorporate your wooden clock into your home decor:
- Gallery wall addition: Hang your wooden clock as part of a gallery wall. Surround it with framed photos, artwork, and other decorative items to create a visually appealing display.
- Shelf styling: Place your wooden clock on a styled shelf along with books, vases, and other decor objects. It will add a unique and natural element to your shelf display.
- Bedroom nightstand: Add a touch of rustic charm to your bedroom by placing your wooden clock on your nightstand. It will not only serve as a functional timepiece but also enhance the overall ambiance of your sleeping space.
- Kitchen counter focal point: Bring warmth and character to your kitchen by displaying your wooden clock on the countertop. It will create a cozy and inviting atmosphere while ensuring you keep track of time while cooking.
Sharing Your Accomplishment With Others:
- Completing a diy wooden clock is no small feat, and you should be proud of your achievement. Here are a few ways to share your accomplishment with others:
- Social media brag: Snap a photo of your wooden clock and share it on your favorite social media platform. Don’t forget to mention the joy of diy and the sense of accomplishment you feel. Who knows, you might inspire others to take on their diy projects.
- Hosting a gathering: Invite friends and family over for a cozy get-together and use your wooden clock as a conversation starter. Share your journey of building the clock and let others appreciate your craftsmanship.
- Gift it to a loved one: If you want to spread the joy of woodworking, consider gifting your wooden clock to a friend or family member who appreciates handmade items. It will not only be a meaningful present but also showcase your talent and dedication.
Remember, a diy wooden clock is not just a functional timepiece; it’s a symbol of your creativity, patience, and craftsmanship. So, proudly display it, find creative ways to incorporate it into your home decor, and share your accomplishment with others.
Enjoy the satisfaction that comes with a job well done!
Frequently Asked Questions Of Wooden Clocks Kits
How To Choose The Right Wooden Clock Kit?
To choose the perfect wooden clock kit, consider the level of difficulty, style preferences, and available tools.
What Are The Benefits Of Building A Wooden Clock Kit?
Building a wooden clock kit enhances creativity, provides a sense of accomplishment, and adds a unique, personalized touch to your home decor.
Are Wooden Clock Kits Suitable For Beginners?
Absolutely! Many wooden clock kits are designed with beginners in mind, providing step-by-step instructions and pre-cut pieces for easy assembly.
Where Can I Find High-Quality Wooden Clock Kits?
You can find a wide selection of high-quality wooden clock kits online, through specialty hobby stores, or at woodworking supply shops.
Conclusion
Wooden clock kits offer a unique and fulfilling experience for both beginner and experienced clock enthusiasts. These kits provide an excellent way to engage in a hands-on, creative activity while also learning about the intricacies of clockmaking. With their versatile designs and customizable options, wooden clock kits allow individuals to express their own personal style and taste.
Additionally, the durability and timeless beauty of wooden clocks make them perfect for both home decor and gift-giving. Whether you are a hobbyist searching for a new project or someone who appreciates the beauty of finely crafted timepieces, wooden clock kits are a worthwhile investment.
So why not embark on a rewarding journey that combines creativity, craftsmanship, and functionality? Take the leap and bring a touch of elegance and charm into your life with a wooden clock kit today.

Meet Aron Crock, a clock hardware expert with seven years of hands-on experience. Aron’s journey into the world of clocks began as a hobby, but his passion soon turned into a profession. He’s known for his deep understanding of clock mechanisms and is highly respected in the field. Aron’s dedication to making clocks tick with precision and his innovative ideas have made him a key player in the industry. He’s committed to pushing the boundaries of clock technology and leaving a lasting impact on the world of timekeeping. Aron Crock is a true clock enthusiast, and his expertise shines through in his work.